Tuesday, March 15, 2016

Pain de Campagne - TWD: Baking with Julia

Tuesdays with Dorie: Baking with Julia - 101st installment. The recipe is Pain de Campagne.
This bread was made from dough with no added yeast and no one is more amazed than I am that it actually rose, and was delicious to eat :-)
The recipe is an "old style" bread, prepared with no yeast other than "airborne wild yeast".  I'm not sure if the yeast is floating around the kitchen, or arrived in the flour bag, but it definitely got going and made the starters ferment and the bread rise.  It takes four days, and the timing was a little tricky to fit around life.  I started it on Thursday night, and then was able to work on it over the weekend, culminating in baking the bread late on Sunday afternoon.
Step 1 - the "chef", initial starter with whole wheat flour, warm water, 1/2 t. milk and a tiny amount of cumin.  This initial starter sits for 2 days at room temperature, covered in plastic.  
Start of step 1
After two days of sitting
It went from a smooth firm dough to a stretchy gooey dough.


Step 2 - the "levain".  Mix a small quantity of the chef with warm water and whole wheat flour.  The traditional method, according to the recipe, is to make a "volcano" of the flour, tear the chef into small pieces and put it in the center of the volcano to soak and soften in the warm water, before mixing everything together into a firm dough.
the "chef" - you remove the crust and
use 2 T. of  the interior
Volcano of flour with chef in center
The levain before rising
The levain after 18 hours of sitting

Step 3 - Refreshing the levain.  You repeat a similar process - small amount of whole wheat flour,  some white flour, warm water, and a portion of the levain (in this case, 1/2 cup) torn into small pieces, and use the "volcano" of flour to soak the levain in the water before mixing and kneading in the flour to form a firm dough.
"Volacano" with soaking levain - for Step 3
Refreshed levain before rising
Refreshed levain after 8 hours of sitting
This refreshed levain sits for 5-8 hours (I did this step overnight - it seemed fine to leave it a little bit on the longer side).
The levain is now ready to be used to make dough.


Again, the levain is soaked in warm water to soften (1 1/2 cups of levain - all of it), and then white flour plus salt is mixed in to make the dough.  I used the Kitchen Aid with dough hook to do this step - very straightforward.  This dough rises for five hours before shaping.
 

Dough before rising

Dough after rising
After rising the dough is shaped into a large round and placed in a form - the traditional one is a basket or bowl, and since I don't have that, I used the suggested substitute of a colander lined with a flour-coated tea towel.


Dough ready for baking
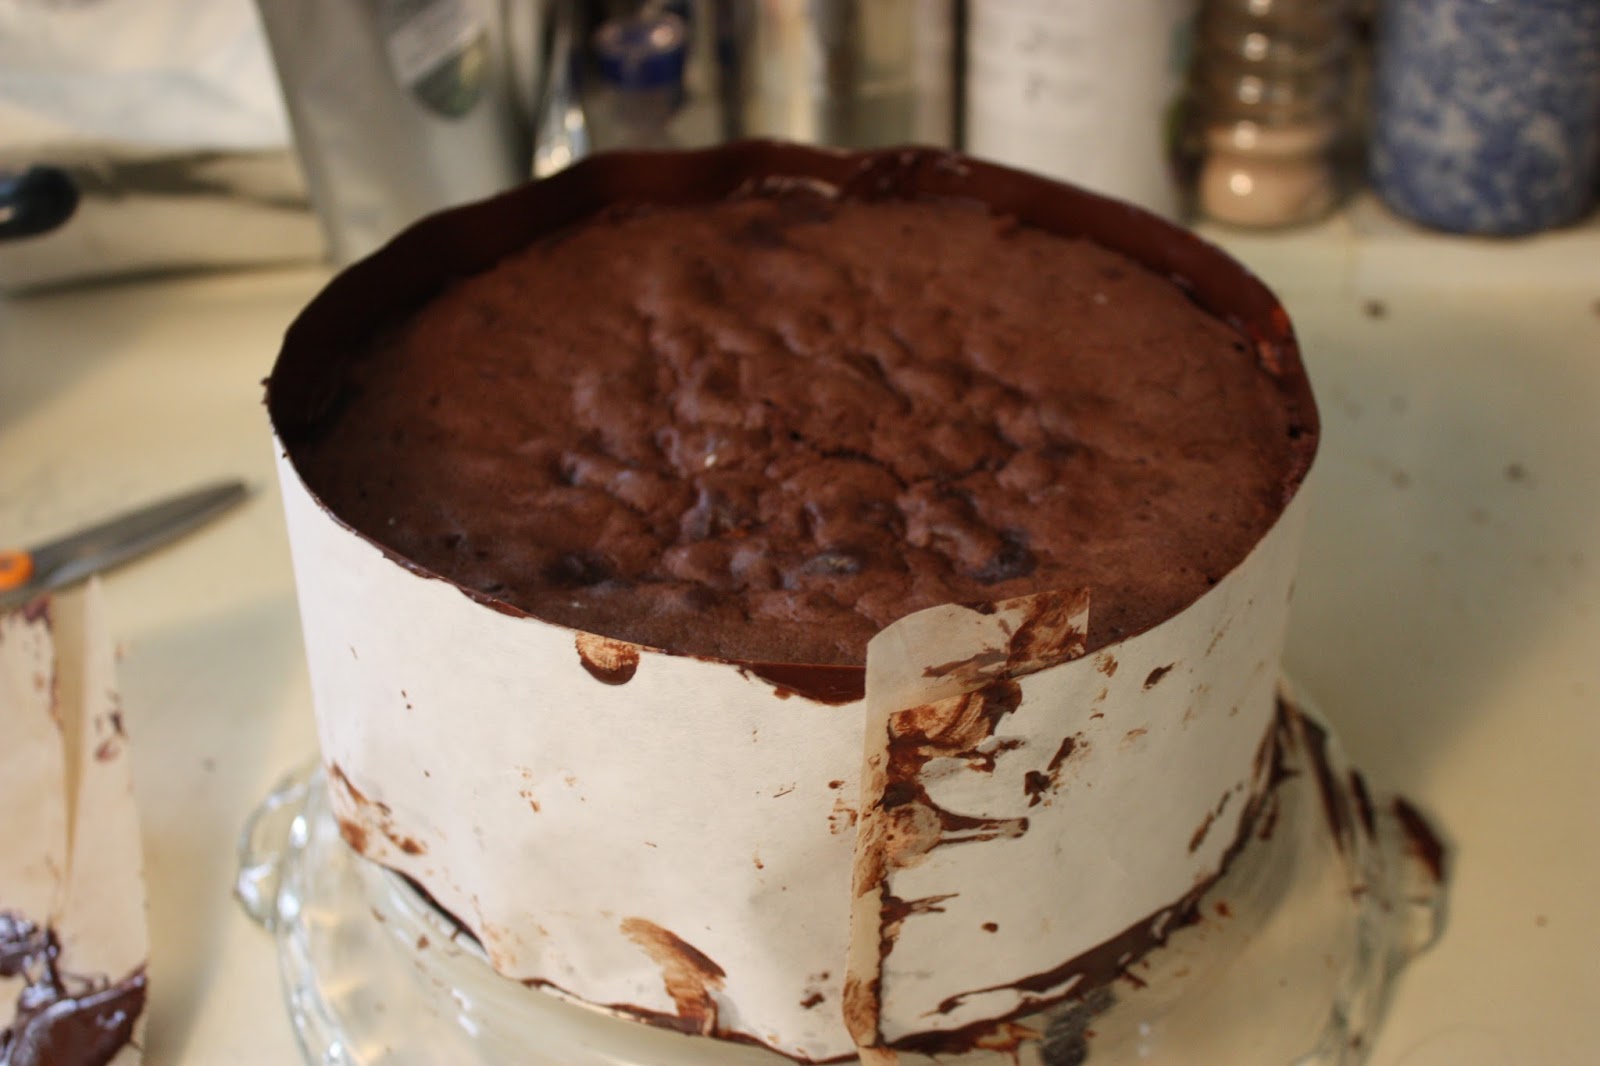
The suggested method is to bake the dough on a pizza stone, using a spray bottle to add humidity to the oven.  At the point I put the dough into the oven, it struck me that it was very dense and not rising very high.  However, it really did gain some height in the oven.  It's definitely a firm and dense loaf, but we really enjoyed it, especially the first night when the crust was really crisp and delicious.


Overall, I was really glad I tried this one - I started out with low expectations, so it was fun to see it actually succeed.  I also took a small chunk of dough to use as a starter for another loaf - looking to try continuing the experiment and see what happens next!


Thursday, March 3, 2016

Meringue Cookies - TWD: Baking with Julia

Tuesdays with Dorie: Baking with Julia - 100th installment. The recipe is Meringue Cookies.
Wonderful to have something nice and simple as the next installment after Chocolate Ruffle Cake.  This couldn't be easier - beaten egg whites with sugar and a bit of salt. I beat them in the Kitchen Aid for the prescribed amount of time and they whipped right up:
I used the pastry bag with a star tip to pipe them out onto parchment-lined sheets. It was fun to play with the pastry bag, and I like the way they look. 
S-swirls before baking

Stars before baking
They baked up nicely - you bake them for 45 minutes at a low temperature (175-200 degrees) so they are crunchy, rather than chewy.   Mine got slightly golden - you are supposed to remove them before they color at all, but perhaps my oven was a little bit warm.
Once done, I drizzled some with chocolate, and used melted chocolate and raspberry jam as fillings.  The unfilled ones kept well for several days in a closed container. This recipe makes many cookies, but you can always decrease the number of egg whites for a smaller batch.
Endless rows of baked meringue cookies

Chocolate Ruffle Cake - TWD: Baking with Julia

Tuesdays with Dorie: Baking with Julia - 99th installment. The recipe is Chocolate Ruffle Cake.
Yes, this cake is completely insane (or is it me who is insane for preparing it?).   The techniques on this one included working with lots of melted chocolate for the decoration, as well as a slightly complicated cocoa-based cake batter. The components that you prepare include:
Chocolate cake:  Whisk eggs and sugar together over heat (I used a pan of simmering water).  Once they are warm, you beat them at high speed until they are tripled in volumn and hold a ribbon when you lift the beater:

Now fold in dry ingredients - cocoa and flour.  This took some doing, as the dry ingredients stayed kind of separate from the whipped eggs as I tried to fold.
At this point, you fold in hot clarified butter, and then you've got your batter ready to bake.  Once done, you let it cool in the pan.

Chocolate decorations: Melt a pound (yes, really) of bittersweet chocolate.   Once melted, you spread it on the backs of jelly-roll pans, in a very thin layer.  Once these sheets are chilled you use an offset spatula to form fan-like "ruffles".  Not exactly intuitive, but I kind of got the hang of it - it helped to watch the video on YouTube.  A bunch of my ruffles turned into shards (see cake photo above). I was glad to be preparing this on a winter day - one can only imagine this process in August :-)  The ruffles go into the fridge to chill when they're all carved.

Fillings: 

  • Crème fraiche, mixed with sugar and vanilla, and one portion of it mixed with melted chocolate, so you have a vanilla and a chocolate filling.
  • Sugar syrup mixed with raspberry eau-de-vie
  • Fresh raspberries
  • Bottom layer with chocolate filling on top

Second cake layer with berries on top
Once it's time to assemble, you cut the cake horizontally into three layers, and then start putting the different layers into a springform pan: Cake brushed with syrup, followed by the chocolate crème fraiche.  Next is another layer of syrup-brushed cake, and then the raspberries in a single layer on top of that. Next layer is most of the vanilla crème fraiche, and then the final syrup-soaked cake layer on top.
This creation gets chilled for several hours, and then you remove the springform ring.  It's time to wrap the cake in a layer of chocolate (?!).    Again, good to watch the video to see how to do this.  It involved painting a measured strip of freezer paper with a thin layer of chocolate, and then wrapping that around the cake.  This is chilled (again) - yes, the elapsed amount of time is many hours!
String of melted chocolate on paper
Cake wrapped with chocolate on paper


Finally, you top the cake with the remaining vanilla crème fraiche, and then decorate with your ruffles, in circles to completely fill the top. Here's the start of that process:
This cake tasted amazing, and was enormous - although it's an 8" cake, it's so intense that it serves 12 to 16 people.  I am glad I made this, although I may not tackle it ever again :-) Working with the chocolate was very interesting, and the flavors of chocolate, raspberry and crème fraiche were delicious.

Wednesday, March 2, 2016

Buttermilk Bread - TWD: Baking with Julia

Tuesdays with Dorie: Baking with Julia - 98th installment. The recipe is Buttermilk Bread.
This is an old familiar recipe for me - I made it right after the first time I saw the show.  We have a bread machine, and this recipe is easy, and reliably delicious.  You basically just put the ingredients in the machine, and use the dough cycle.  It includes maple syrup, butter, and powdered buttermilk. 
Dough spinning in the machine


Once it was done rising, it has one rise in the bread pan, followed by baking.  It browns up nicely, and once cooled, is easy to slice. I've only made this dough in the bread machine, but it seems like it would work fine in a mixer or by hand.
Risen dough before baking

Babas - TWD: Baking with Julia

Tuesdays with Dorie: Baking with Julia - 97th installment. The recipe is Babas.
After the Savarin project back in 2013 (wow - so long ago!), I was kind of skeptical that I would like this, but I was pleasantly surprised.  The dough is the same dough from that cake - a yeast dough, but this time I included the currants soaked in rum.  The dough was very easy to make in the Kitchen Aid mixer.  I didn't have the prescribed baba molds, but I have a mini popover pan that seemed similar in shape to the cylindrical baba molds, which allow the top to rise up and form a crown.
Before rising
After rising
 
Once the babas are risen in the molds, you bake and cool them.  In parallel, you make some pastry cream, which should be chilled in preparation for assembly.
Now to finish them:  you make some sugar syrup, dip each baba into the hot syrup and then cool on the rack. You fill each baba with pastry cream - I used a pastry bag with star tip to poke a hole in the bottom of the baba and squeeze cream into the baba, followed by piping a small rosette on the top of the baba. I topped it with a few bits of candied orange peel.  The flavors were a bit subtle, and unusual, with the yeast-based cake, but we really enjoyed them.  

Tuesday, March 1, 2016

Cornmeal-Currant Biscotti - TWD: Baking with Julia

Tuesdays with Dorie: Baking with Julia - 96th installment. The recipe is Cornmeal-Currant Biscotti.
Good to drop back from the Brie extravaganza of last month to a more simple recipe - a yummy cornmeal biscotti from Nick Malgieri.
This recipe is very easy and the flavor is good. There are equal amounts of cornmeal and flour, with egg, butter, and currants, plus lemon zest and vanilla.  you cut the butter into the dry ingredients (similar to pie crust):


After mixing the wet ingrediting into this mixture, you form logs from the dough.  At this point, you can either bake the log (for traditional biscotti shape), or flatten the log and cut diamonds out of it.  I tried both methods.

Once you've baked the log, you slice and bake the slices, as in regular biscotti recipes, for a crunchy style of cookie.   The diamonds are complete after one baking, and are a softer, crumbly style of cookie.  We liked both of them - kind of a nice change to have a cookie with cornmeal and lemon as the primary flavors.

Brie in Brioche - TWD: Baking with Julia

Tuesdays with Dorie: Baking with Julia - 95th installment. The recipe is Brie in Brioche.
Wow - what a blow-out recipe :-)  Finally got to this in January, and it was definitely delicious and had some unique techniques along the way.   This recipe isn't a ton of work, but does need advanced planning, as there are various chilling steps of multiple hours.

An entire wheel of Brie is topped with super-carmelized sweet onions, and the entire thing wrapped in brioche dough and baked.  The recipe makes 16-20 servings (!!), and given that we weren't having a party, we were snacking on this for days, extending the holiday eating period by an additional week 
:-)
Carmelized onions after pressing in the colander
The onions are carmelized by cooking 6 whole large sweet onions with a stick of butter in the slow cooker on low for 24 (!!!!) hours.   They turned an amazing color, and the fragrance in the house was pretty incredible.  Once they've cooled, you weight them in a colander to extract any remaining liquid. These flattened onions are sliced in half horizontally in preparation for assembly.

The brioche dough recipe is designed for a bread machine (which we have), so that was incredibly easy - put the ingredients in the machine, set for "Dough", and then a quick check to be sure it's the right consistency after mixing.   You could certainly make this dough by hand or in the power mixer.  Once the dough has gone through its initial rise, it needs to be chilled for at least 24 hours.
Finally, it's time to assemble.  You line a 9" springform pan with part of the dough, put the cheese wheel on top of it, top with the onion slices, and then cover in more dough, tucking in the sides to close off the cylinder.  One last piece of dough is used to make a braid for decorating the top.
The assembled creation is brushed with egg wash and left to raise for 40 minutes before baking for a total of 45 minutes.
It is served in slices -  here's one of ours.  


The cheese oozes out, so it's not necessarily beautiful, but delicious - the combination of butter brioche dough, sweet onions, and melted Brie is wonderful.

Vanilla-Hazelnut Cheesecake - TWD: Baking with Julia

Tuesdays with Dorie: Baking with Julia - 94th installment. The recipe is Vanilla-Hazelnut Cheesecake.
This is a very simple and tasty cheesecake with a non-traditional ingredient list, including cottage cheese. 
First step - a caramel hazelnut paste.  You prepare a caramel syrup, and then stir in chopped, toasted hazelnuts. Once this is cool, you process it in the food processor into a paste (mmmmmm.....)

Now the unexpected cottage cheese step - you drain it for a hour in a strainer, and then process it in the food processor until it is silky smooth. 
Cottage cheese after processing
You add the additional ingredients to the processor:  Neufchatel cheese, eggs, sugar, salt and vanilla.  Once that is combined, you mix a cup of this plain batter into the hazelnut paste, to make the hazelnut batter.

To bake the cake, you put the plain batter in an 8" pan, and then top with dollops of hazelnut batter.  The cake is baked in a water bath (inside a roasting pan with boiling water), and then cooled and chilled.  Once unmolded from the plan, you press graham cracker crumbs on the outside edge (this step was a pain - seems a little fussy, given the ease of the rest of the recipe!).
Here's the finished cake - I think I would try to make the top a little more marbled next time:

We really enjoyed the cake - it's lighter than the traditional cheesecake, but the flavor and texture were very nice, and the hazelnut caramel flavor is a great addition to vanilla cheesecake.

Parmesan Puffs - TWD: Baking with Julia

Tuesdays with Dorie: Baking with Julia - 93rd installment. The recipe is Parmesan Puffs.


Didn't mean to completely fall off the wagon on Baking with Julia - I have been baking and keeping up with the monthly recipes, but not setting aside the time to blog about it!  Clearly, baking is more important to me than writing :-)  But now it's time to catch up on the backlog....

These puffs are described as a way to use up puff pastry scraps.  I didn't have any leftovers, so I needed to make another batch of puff pastry - at least all this repetition is demystifying the puff pastry process! 

You roll out the dough, cut it into diamonds (I used a fluted pastry cutter) and heat up 2" of peanut oil.  Once the oil is at 325 degrees, you fry the diamonds for 5 minutes.


After frying, you sprinkle the puffs with parmesan cheese.  The puffs were really delicious, and we devoured them quickly.  This is a really simple recipe and would be pretty handy if you had some scraps hanging around after a puff pastry project - the only drawback is the hassle of disposing of deep frying oil after you're done.